Java Installation Process :
Dear readers, in the series of Selenium Tutorial, today I am going to tell you about Java installation process. You need to install Java in your system in order to work with Selenium. So you can easily install Java in your system by following below steps.
Java Installation Process For Windows 7/8/10/11
Step 1: Go to Java download.
Step 2: Select the OS for which you want to download Java.
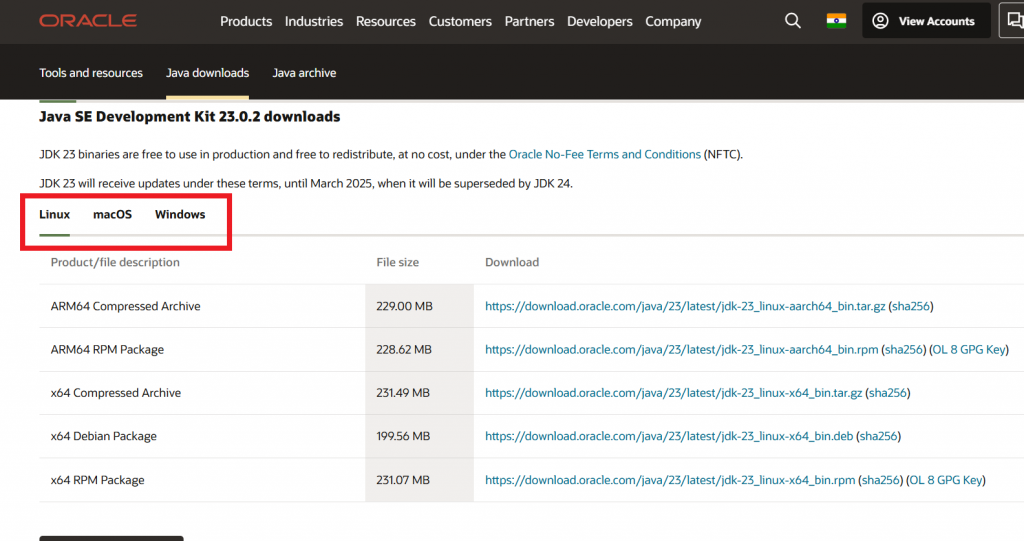
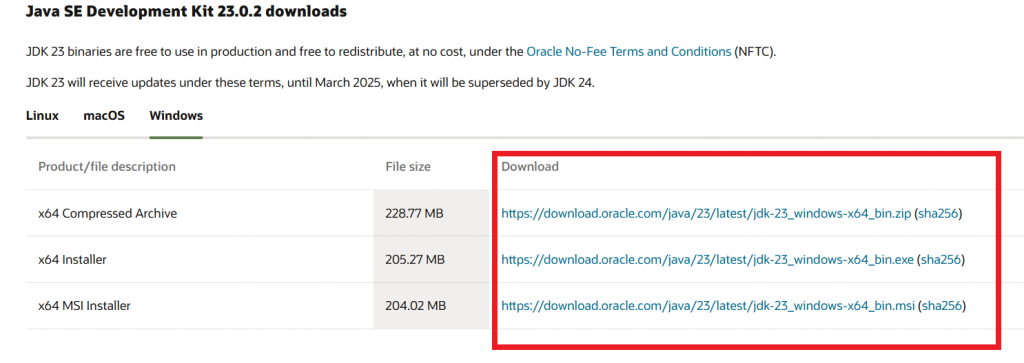
Step 3: Based on available architecture of your OS installed, click on the link to download.
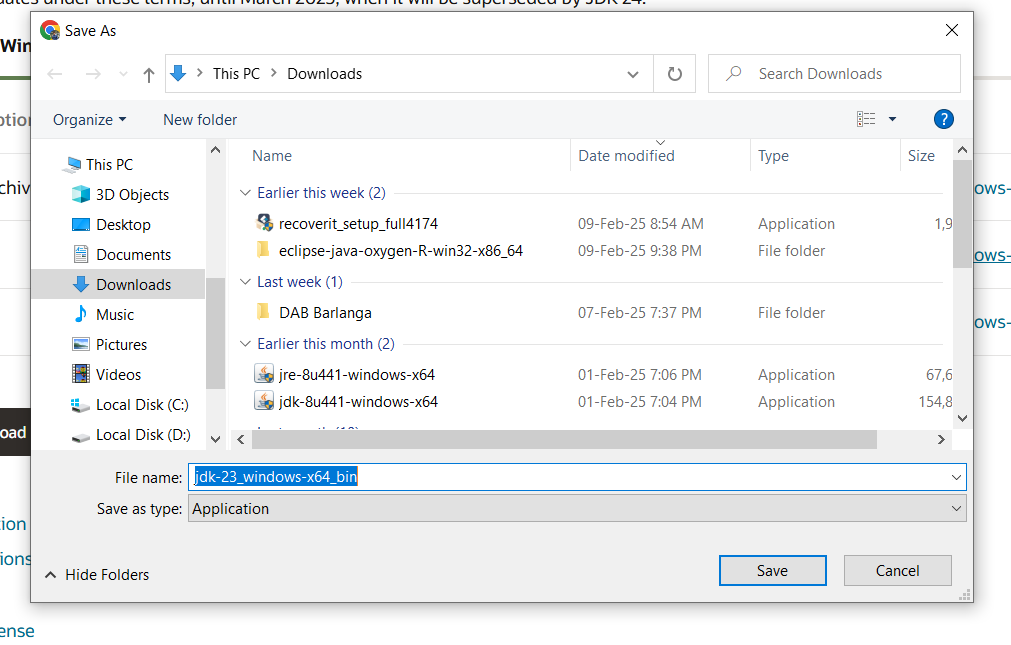
Step 4: Select the location to save installer and click on Save button. Wait for download to finish.
DIGITEK DWM101 Camera Microphone
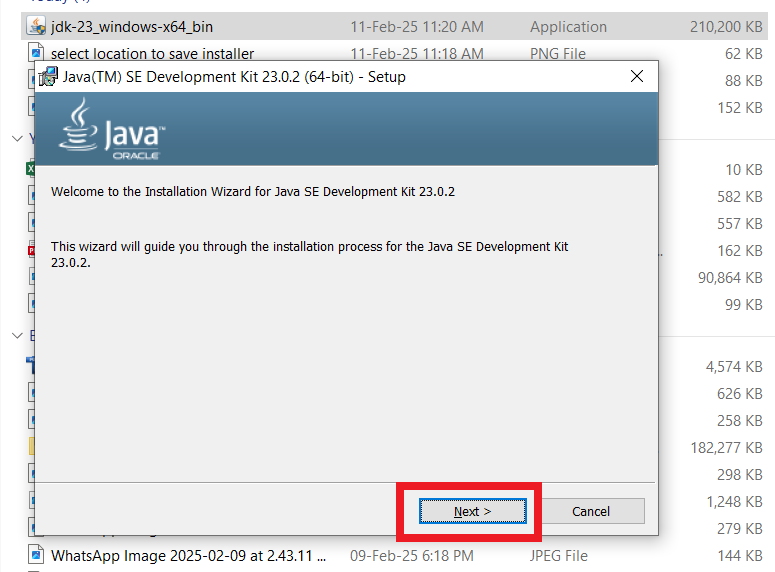
Step 5: Once the download finish, go to downloaded location and double click on installer to start the installation process. Click on Next
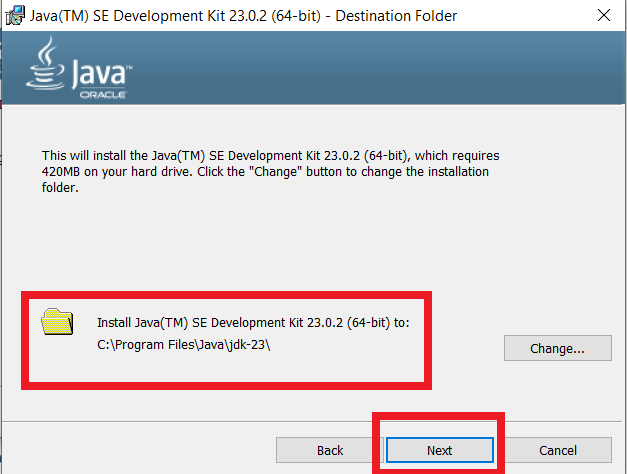
Step 6: Select installation location and click on Next.
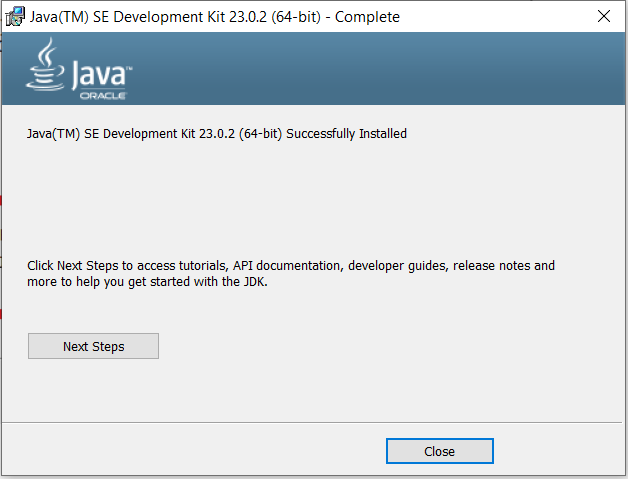
Upon clicking Next, installation process will start. Once finish, you will see below screen as mentioned in below step.
Step 7: Finally click on Close.
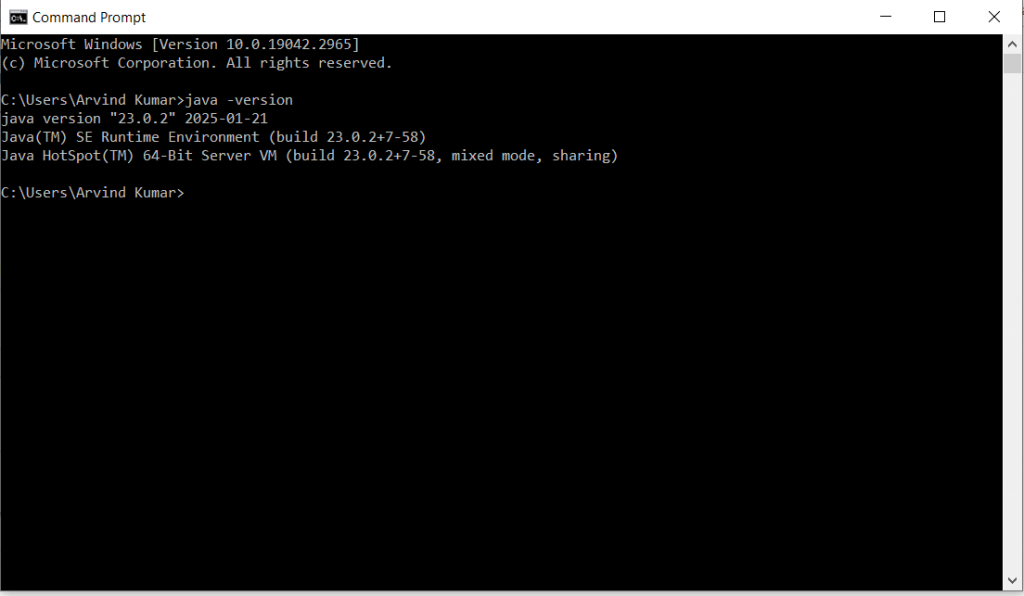
Step 8: For confirmation of installation of Java in your machine, Open command prompt type java -version and hit enter key. It will display the details of Java version installed as shown in below screenshot.
So I hope, you have understood the Java installation process. You can watch the entire process in video as well.
In my next article, I will tell you how you can set path and class path for Java.